The Pre-Production Release of APEX 20.2 is now available on apex.oracle.com! There are lots of new and useful features that we can’t wait to start using. In this article, we’ll have a look at the new REST Data Source Synchronization feature will be super handy when using APEX to extend ERP Cloud. We gave this a runout on apex.oracle.com, using it to pull down ERP Cloud Organizations into an APEX table on a set schedule.
Step 1 - Configure the REST Data Source
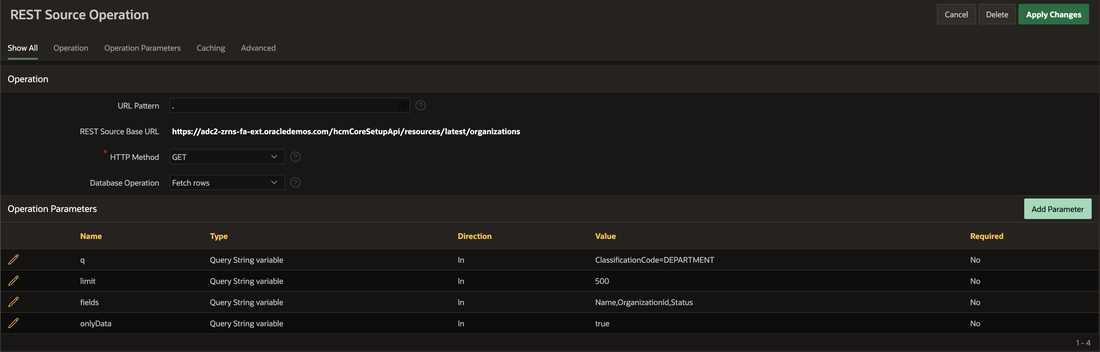
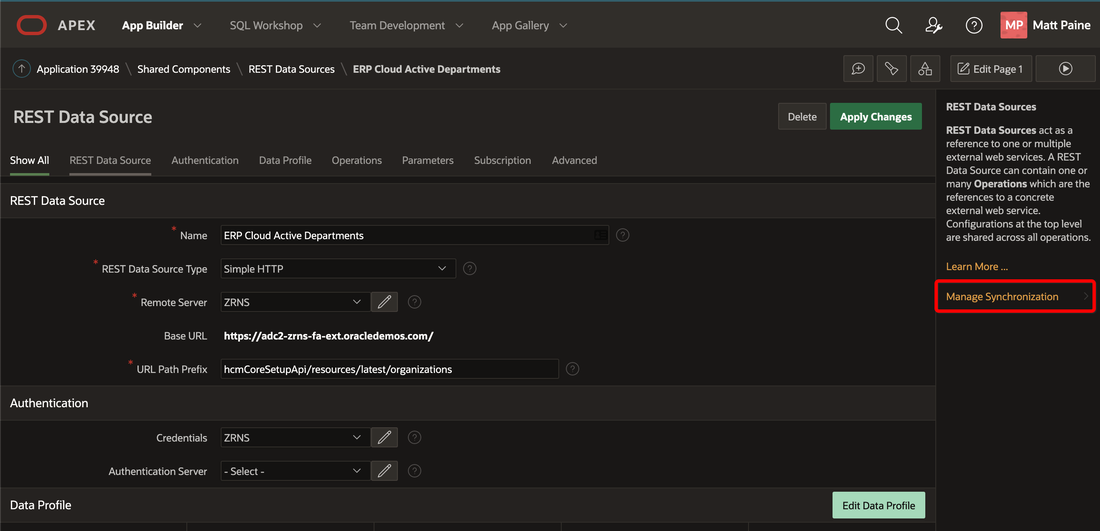
We configured the REST Data Source as below, using APEX Web Credentials to connect to the Vision Demo ZRNS environment, configuring the organizations HCM rest service to return the following fields for all active departments: OrganizationId, Name and Active.
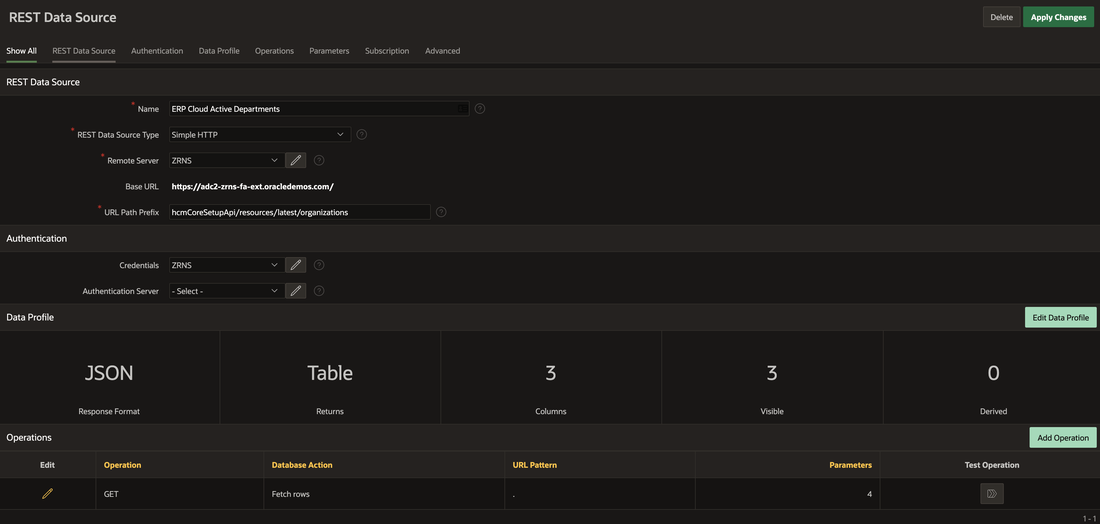
Query String variables are used to configure the selection criteria and data returned.
Before attempting synchronization, we test the web service call to make sure it is functioning correctly.
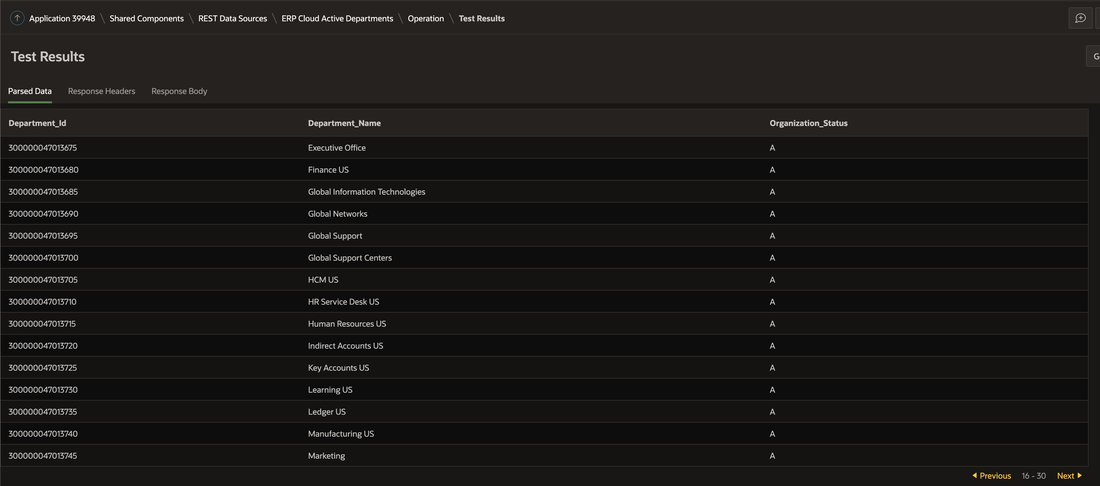
We can check this for accuracy against the source data in ERP Cloud.
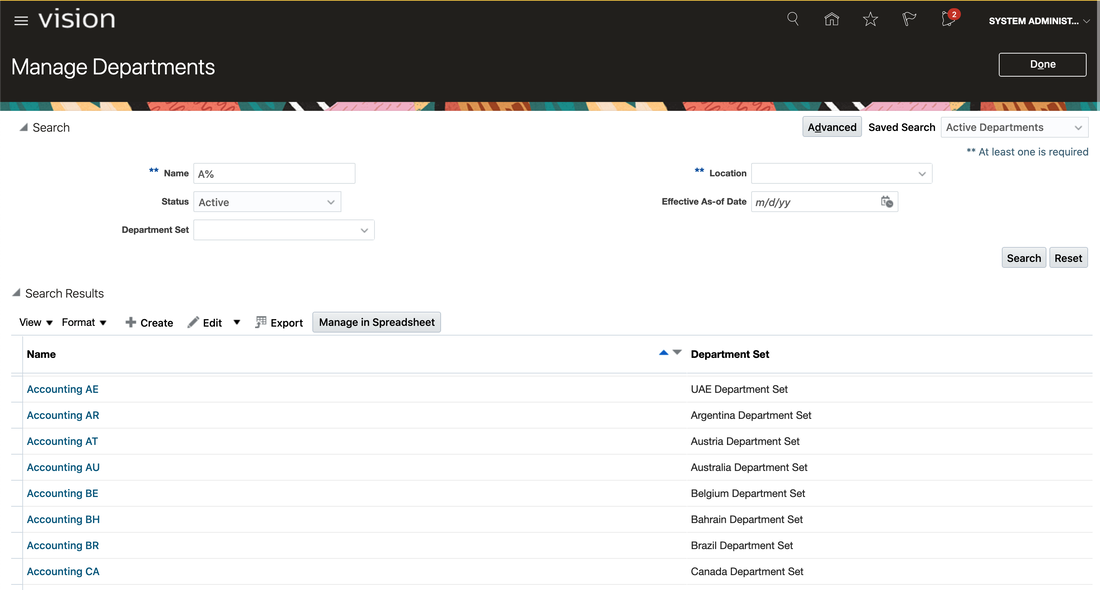
Note, Vision is shown below with the Redwood theme; we’re looking forward to trying out the new APEX 20.2 Redwood Light Theme for our ERP Cloud Integrations.
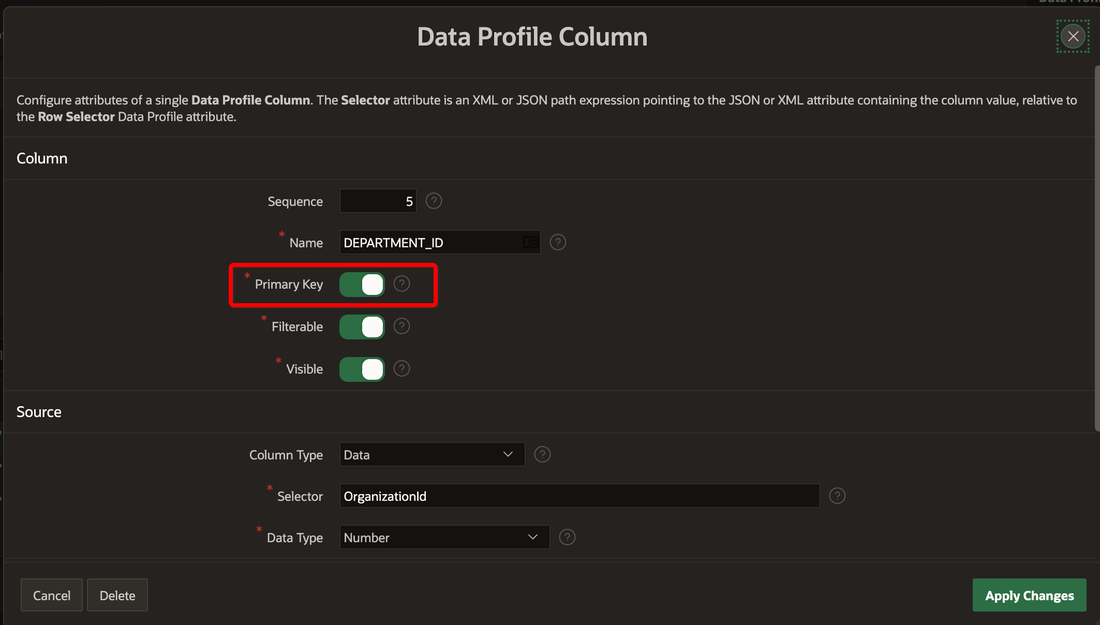
An important step is to identify the Primary Key of the returned data; this is used if you’re Merging the data every time it is synchronized.
Step 2 - Configure Synchronization
We clicked on the new Manage Synchronization link to start the configuration process.
Here we choose a target table.
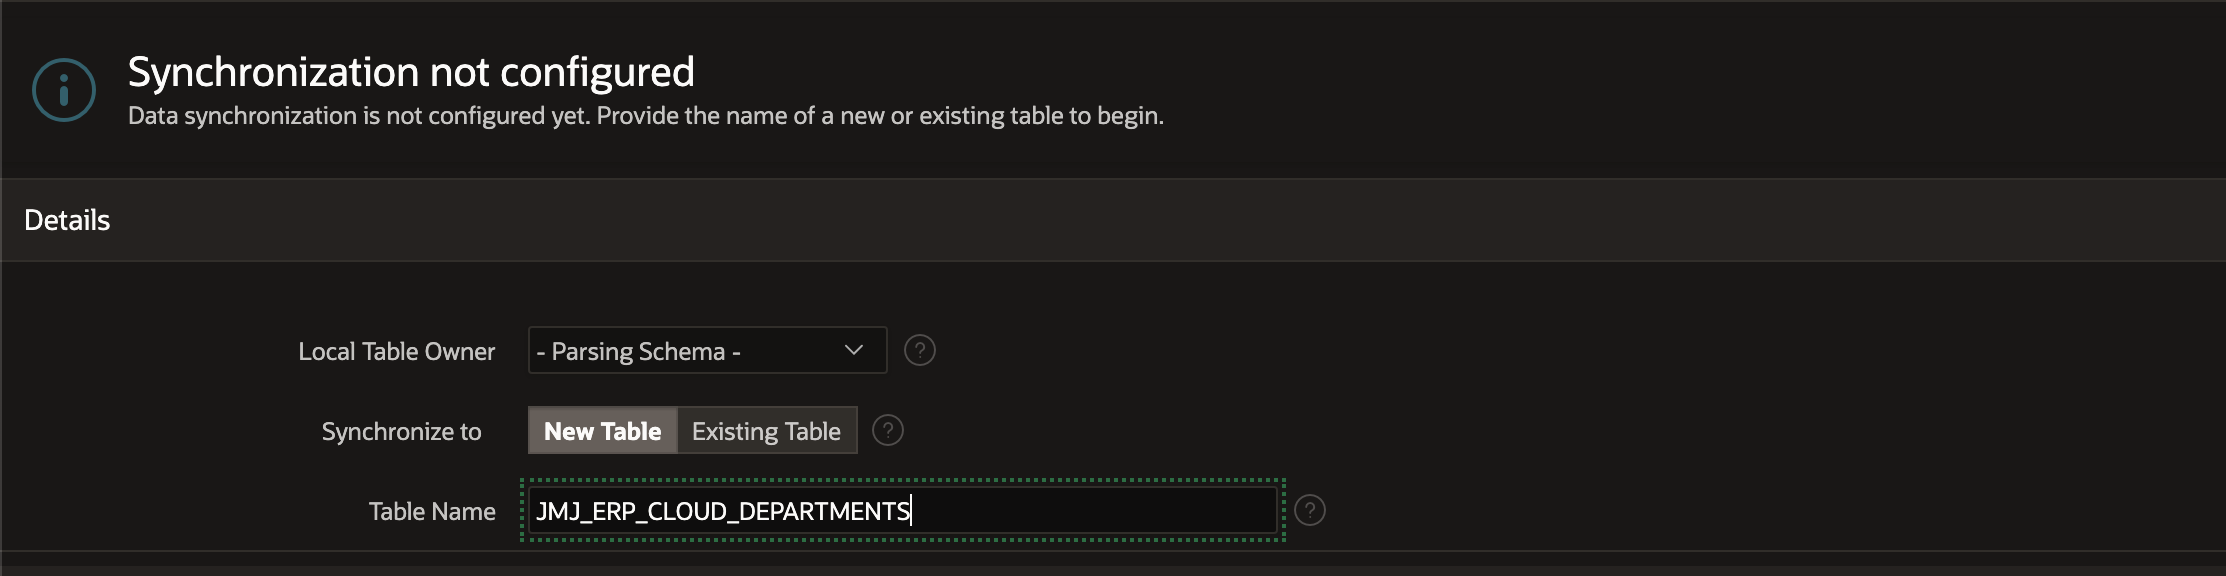
If none exists, APEX will create a new table for you with columns matching your REST Data Source.

Note, If your REST Data Source changes at a later time, for example if columns are added or renamed, APEX can generate and apply the DDL required to bring the table in line.
In the next step, we have to choose the Synchronization Type:
- Append - rows are added to the end of the table.
- Merge - rows are merged using the primary key defined earlier.
- Replace - the table is truncated (or deleted) before rows are inserted.
The Synchronization Schedule is expressed using same syntax as DBMS_SCHEDULER, so tables can be synchronized every 15 mins, 2 hours, day etc.
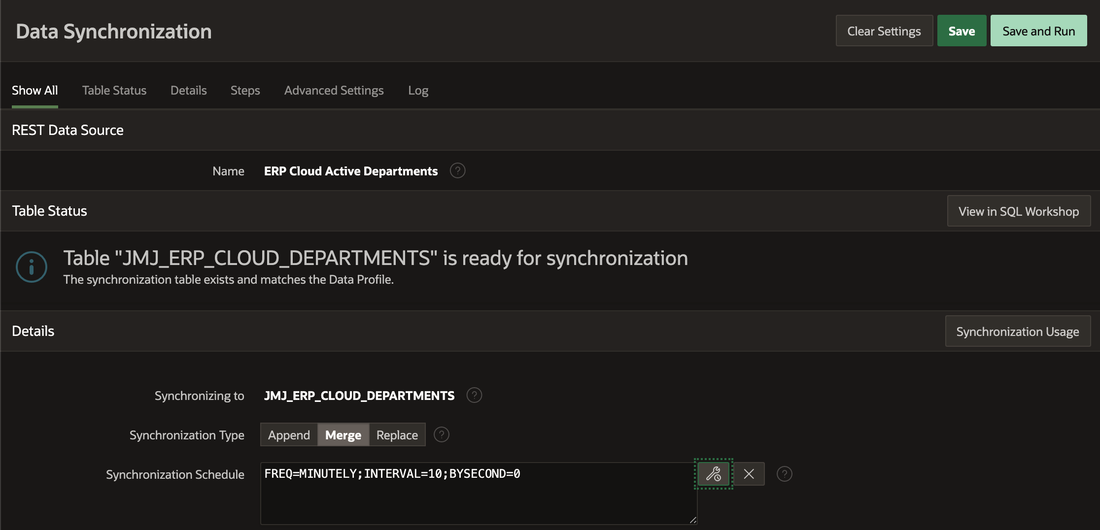
All done - now we can save the Schedule and we’re told when this will run.
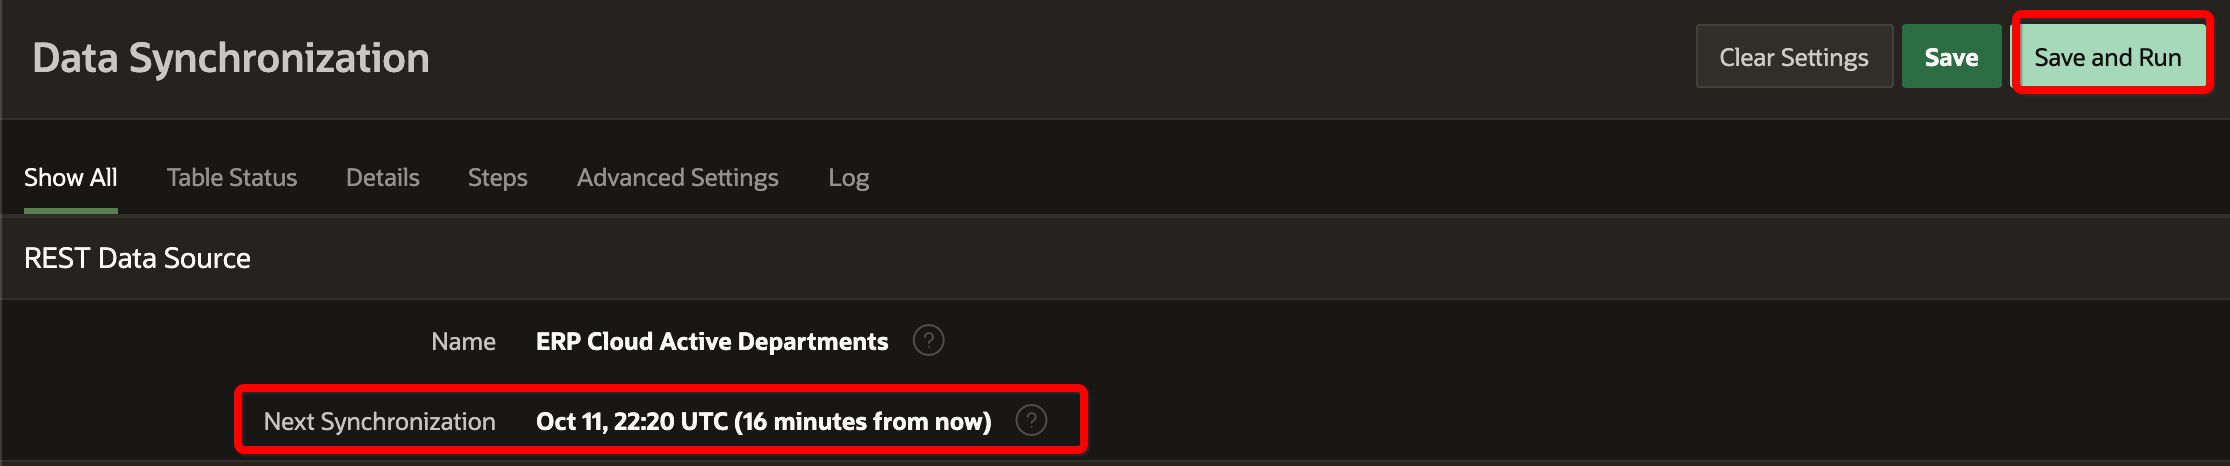
We can also run it On Demand using the Save and Run button.
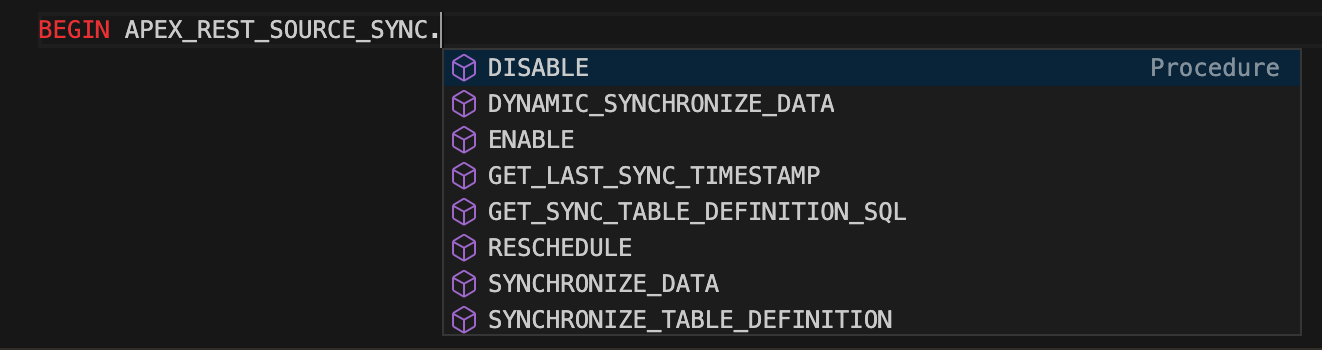
Looking at the new APEX_REST_SOURCE_SYNC package, we should also be able to start synchronization programmatically using a PL/SQL procedure call.
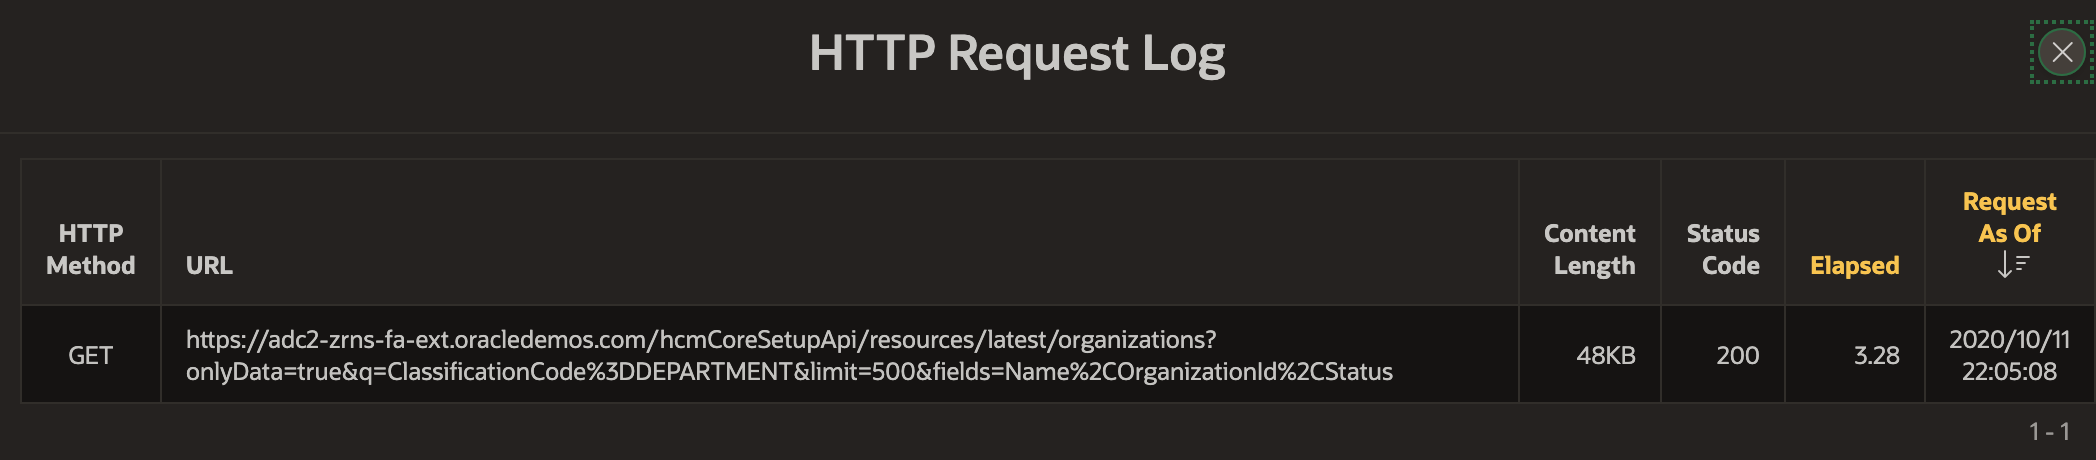
Step 3 - Synchronization Results
Once Synchronization has run, the log entries give us rowcounts, message sizes, and execution times.

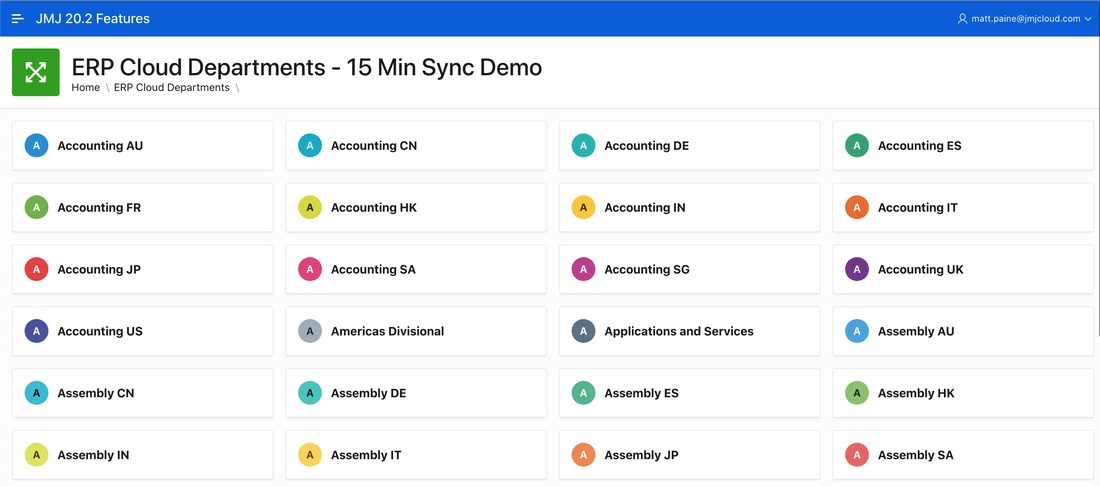
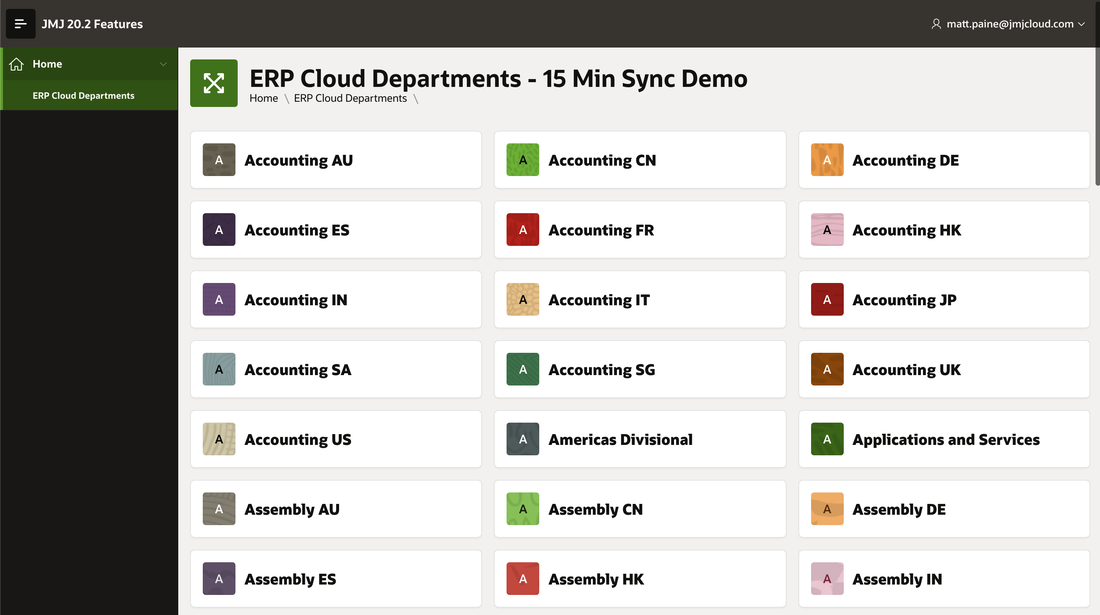
Data is now available in our custom table. We used the APEX 20.2 Declarative Cards layout to show the data.
And just for fun, this is what it looks like with the Redwood theme:
We can also use the new APEX 20.2 Excel downloads to get our newly synchronized data:
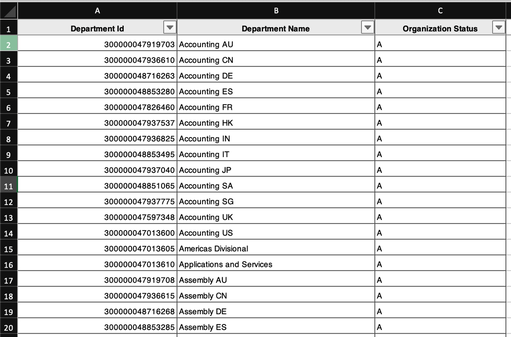
Behind the scenes, the JMJ_ERP_CLOUD_DEPARTMENTS table contains the columns we requested, along with a couple that APEX uses to keep track of synchronization.

Conclusion
This was our first look at this new feature in APEX 20.2 and in about 15 minutes we were able to create a new workspace, ERP Cloud data source, and synchronize data into a custom table.
We didn’t have to write a single line of code to call web services, map returned data into tables, or record web service calls and responses.
This is fantastic functionality, and we look forward it using it in our work using APEX to extend and integrate with ERP Cloud. We hope ERP Cloud follows the industry and continues to migrate old SOAP services to REST. This will make integrations like this much simpler and help customers gain the maximum benefit from their ERP Cloud Investment.
This is yet another example of expectations being exceeded by the APEX Development Team! Thanks to all those who worked hard behind the scenes to make this happen.
Matt Paine, Co-Founder JMJ Cloud